Sunday, November 3, 2013

Purgatory Flats

Sign at the Trailhead.
Purgatory Flats is a nice and easy hike that is great for the entire family. It is easy to get to and one of those rare hikes that proceeds downhill from the get go (until you hike back out). It was perfect for me as I severely sprained my left ankle about a month ago on a trail run and this was the first hike I attempted after a nasty sprain. The hike slowly meanders through numerous aspen groves and arrives in the valley through which Cascade Creek flows.

Directions: From downtown Durango, head north on Highway 550 approximately 25 miles to Tacoma Drive. Look for the entrance to Durango Mountain Resort on the left side of the road, and Tacoma Drive is directly across from the entrance on the right (east) side of 550.
View of Engineer Mountain from parking lot.
Take a right onto Tacoma Drive and follow the road for maybe a quarter of a mile and you will see a dirt parking lot on the left side of the road next to a small lake. Park in this lot and hike back up the road a few hundred feet across the bridge to the trailhead, which is on the opposite side of the road from the parking lot.

Trail: The trail starts out nice and easy passing by a registration sign for the Weminuche Wilderness Area. After the sign, the trail descends down a number of relatively steep switchbacks and then it follows along side Purgatory Creek. After about a half-mile, the trail crosses over Purgatory Creek on a make-shift stone pathway. After crossing the creek, the trail gets steeper for a bit as travels through a number of aspen groves, which would be beautiful during the peak fall color.
Crossing over Purgatory Creek.

Unfortunately, I missed the peak by a few weeks and most of the colorful leaves had already fallen.  After about 1.2 miles, the trail begins a series of switchbacks as it makes a final descent to Purgatory Flats. At 1.7 miles, the trail reaches Purgatory Flats and splits left and right.

If you turn to the left, you can follow the trail upstream and along Cascade Creek. If you turn and follow the trail to the right, heading downstream, you can hike all the way to the confluence of Cascade Creek and the Animas River, where there is a nice pedestrian bridge over the Animas.  If you time it right, you can watch the Durango & Silverton Narrow Gauge Train go by.
View of Purgatory Flats with the Needles in the Background.

Purgatory Flats is a large, flat area along side Cascade Creek that has plenty of places to hang out with the kids for a day of exploring or to camp overnight as I viewed numerous fire rings just off the trail.


Cascade Creek flowing through the valley.
A bit of fall color still left across the valley.
Map of hike.

Elevation profile of hike.

Sunday, September 15, 2013

Ice Lake Basin

Ice Lake Basin is a very popular hike in the San Juan Mountains, and for good reason. It is a not too strenuous hike through high alpine meadows, pine forests and with waterfalls at every turn.  Seriously, if you love waterfalls this is the hike for you. They are present around every corner, and even when you can't see them, you can pretty much hear them throughout the entire hike. With all the running water, there are several small stream crossings during the hike and so I would suggest bringing a second pair of shoes to get wet on the crossings.

Directions: From Durango, travel north on Highway 550 about 50 miles to Silverton, CO. Continue on Highway 550 out of Silverton for 2 miles and turn left onto County Road 7 and drive 4.3 miles to a small parking lot on the right side of the road and that is right across from the South Creek Mineral Campground. The trail leaves from the western end of the parking lot. There are actually two trail heads for this hike. If you have a 4 wheel drive vehicle, you can drive up the road to Clear Lake (County Road 12) and park at the first sharp right-hand turn. Driving up to this second trail head cuts off about 500 vertical feet of elevation.

Trail: From the parking lot, the trail heads in the woods and begins to climb through numerous switchbacks. After about 0.8 miles, the switchback comes to an end and the trail comes to a "T." Head left to continue on the main trail. If you head to the right, you will come to a waterfall that you have to cross if you park at the upper trail head off of Clear Lake Road. When the water is low, crossing the stream below this waterfall is pretty easy. However, I hiked the trail from the upper trail head after a weekend of heavy rain, and crossing by this waterfall was quite difficult. From here, the trail climbs gently through the woods and into meadows strewn with wildflowers where there is one or two side trails to view a number of cascading water falls. After this meadow, the trail heads back into woods and begins to climb again through numerous switchbacks.

Lower Ice Lake Basin
Waterfall down the headwall.
The trail levels out after just over a 0.5 miles and enters into Lower Ice Lake Basin. The trail meanders through the Basin crossing several small streams and small, high alpine lakes. Wildflowers are plentiful and numerous waterfalls dot the Basin walls. After about 0.6 miles, the trail crosses a larger stream and then begins to climb through a traverse in the gap of a headwall down which numerous waterfalls cascade. After you hike through this traverse, the trail begins the final climb to Ice Lake making numerous switchbacks. At times, the trail seems more like a stream bed than a trail.

Once you crest this final climb, it is an easy walk to Ice Lake, which is named for its distinctive blue color caused by the silt content of the water. Surrounding Ice Lake are numerous 13,000 foot peaks, which offer a number of challenging climbs, if you are so inclined. In addition, you can hike to Fuller Lake, which is towards the south, or to Island Lake, which is towards the north. The round trip hike to Ice Lake is about 5.5 miles with a starting elevation of 9,800' and a final elevation of 12,275'.
Ice Lake

Ice Lake
Elevation Profile (one direction)

Map to Ice Lake


Saturday, August 31, 2013

Hiking the Crater Lake Trail

The hike to Crater Lake offers beautiful views of the surrounding San Juan Mountains through rolling terrain, high alpine meadows, pine glades and to the base of Twilight Peak.  It is a high altitude hike that will get your heart beating as the hike starts at an elevation of 10,750 feet and climbs to 11,700 feet. It is doable as a rigorous day hike but there are a number of nice campsites around Crater Lake for those looking for an overnight hike and camp out.

Directions: From Durango, head north out of town on Highway 550 for about 40 miles to Andrew's Lake, which is where the trail head is located. The road to Andrew's Lake will be on the right (east) side of the road after going over Coal Bank Pass and as you begin to climb towards the top of Molas Pass. Look for the sign and follow the road to the lower parking lot.
View north from Snowdon Ridge.

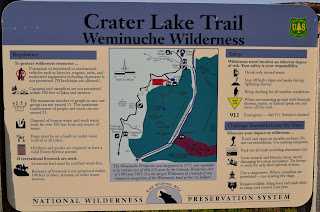
Trail: From the lower parking lot at Andrew's Lake, follow the concrete path next to the bathrooms over the bridge until you see a hiking trail veer off to the right and uphill.  Follow this trail to a large sign and a registration book for the Weminuche Wilderness. Register and proceed up the trail, which begins to climb through a number of wide switchbacks.  Once you reach the top of this first ridge, you will have great views of Snowdon Peak to the east, along with a number of lakes and high alpine meadows. The trail heads south from the top of the ridge line and begins to descend for about a mile.
Trail heading through meadow with
Twilight Peak in the background.
At about the two mile mark, the trail begins a short steep climb as it enters into the Weminuche Wilderness Area.  After this climb, the trail gets a bit rough and was quite muddy in places crossing over a number of small streams.  The trail then goes through some rolling terrain before it climbs once again to another ridgeline through the pine trees.  From here the trail descends and crosses over Three Lakes Creek.  After crossing the creek, the terrain becomes rolling and the trail travels through a number of meadows offering great views of Engineer Mountain to the west and the Twilight Peaks to the south. The trail heads back into the woods, climbs through a blow-down area and then reaches a crest before heading down into a number of high-alpine wetlands.
View of Engineer Mountain to the west.
After moving through this area, the trail descends again to Crater Lake. There are plenty of campsites around Crater Lake, just make sure to stay at least 200 feet from the lake. I saw a number of fish jumping in the lake and pika running around in the nearby rock fields. There are a number of trails around the lake that are great for exploring the area. My out and back hike was a total of 13 miles and took about five hours, but I spent quite a bit of time at Crater Lake having lunch and exploring the area.  

Crater Lake
Map of hike. Started at left at Andrew's Lake and ended at right at Crater Lake.


Elevation Profile

Sunday, July 21, 2013

Hermosa Creek Trail - North Trailhead

The North Trailhead
The Hermosa Creek Trail is a very popular trail with hikers, trail runners, and mountain bikers.  The trail travels through the midst of a vast roadless area with many side trails to enjoy. To truly explore the entire area would take days, possibly weeks.  Both the north and south trailheads are easy to access, with the south trailhead just a few miles north of Durango, and the north trailhead just to the west of Durango Mountain Resort.  This post is about an out and back trail run from the north trailhead.

Directions: From Durango, head north approximately 30 miles on Highway 550 to Durango Mountain Resort (fka Purgatory). Turn left into the Resort entrance and follow the main road looking for the signs pointing to Hermosa Park Road, which will be on your right.  Follow Hermosa Park Road, which quickly turns into a dirt road and begins to climb.  The road is well maintained and easily traveled by the average passenger car. The road is also known as Forest Service Road 578 and it will fork once or twice prior to descending into the Harris Ranch area. Keep following the signs to Sig Creek Campground and Upper Hermosa Creek Campground and you will head in the right direction.
Trail descending towards Hermosa Creek.
 After about 4.5 miles heading mostly due west, you will see the Upper Hermosa Creek Campground and the north trailhead for the Hermosa Creek Trail on your left. Turn left, drive through the creek and park in the large parking lot. There are vault toilets located next to the parking lot.

The Trail:  It starts out as a nice double track that climbs for a short while through large stands of pine trees, then begins to descend and runs right along Hermosa Creek. Soon you will have cliffs on both sides of as you descend into the Hermosa Creek drainage. Multiple times you will have to cross smaller creeks flowing into Hermosa, but none are difficult to get across. The entire time we were running the trail, marmots were serenading us with their whistling sounds at every turn.

The trail does get rocky at times but overall is not too difficult as it generally rolls uphill and downhill with the terrain as it runs along the creek. At about the 5 mile mark, the trail crosses over a well-built foot bridge.  If you are doing a day hike, there is a nice open meadow just across the cross the bridge that makes for a great place to stop for lunch, and then head back to where you began. Just remember, the way back is upstream and, as a result, generally uphill.

Bridge over Hermosa Creek.
If you are seeking a rigorous day hike, or an overnight backpacking trip, you can hike the entire Hermosa Creek trail from the north trailhead to the south trailhead - a distance of approximately 20 miles. You can drop a car off at the south trailhead and then have someone drive you to the north trailhead. There are several nice campsites along the trail plus many side trails to explore. Hermosa Creek and many of the creeks that flow into it are known as good trout streams, so bring your pole and try your luck.
Hermosa Creek.
Terrain map.

Sunday, June 30, 2013

Cascade Creek Trail

View of Cascade Creek from the trail.

Cascade Creek is one of my favorite hikes so far in the San Juans. It is easy to get to, offers beautiful scenery but with gently rolling terrain that makes it accessible to hikers of all abilities.  While I was hiking the trail, I felt like I was in Oregon hiking the coastal range because of how lush and green the vegetation was along the trail, with a copious amount of wildflowers and towering pine trees.

Flume from the old Yeager Lumber Mill.

Directions: To get to Cascade Creek, head north out of downtown Durango on Main Ave., which then becomes Highway 550. Stay on 550 for approximately 30 miles where you will pass the entrance to Durango Mountain Resort. From here travel, about 2.3 miles. Just after passing Cascade Village, which will be on your left, 550 will make a tight, hairpin turn to the right.

About 3/4 way through this turn, the guardrail will end and there is a dirt road on your left.
Hiking through a meadow.
Turn onto this dirt road, which provides access to Cascade Creek. The road is fairly smooth smooth and easily traveled by any car.  After about a 3/4 of a mile, you will come across a parking lot on your left. It is right before a bridge, which goes over a flume from an abandoned lumber mill. Unless you have a capable 4WD or AWD vehicle, park here as the road gets very rough. If you do, you can drive another mile to the trailhead, where there is additional parking. You are at the trailhead when you reach a metal gate blocking the road.

Hiking through the pines.
The Trail: Pass through the gate and travel up the road a few hundred feet, the trail then peels off to the left through a small meadow crossing a shallow rocky stream.  In about a 1/4 of a mile, the trail splits. If you head to the right - the heavier traveled trail, you will hike along the eastern side of Cascade Creek. I recommend taking the road less traveled, and head left and then take another sharp left after a few yards. This will bring you to the banks of Cascade Creek. Change into your water shoes (or go barefoot) and ford the stream.

Cascade Creek.
When you cross over, head to the right and upstream. The trail stays mostly in eye-shot but always in earshot of Cascade Creek. You will hike through towering pine trees interspersed with high mountain meadows. The trail does have a few climbs but nothing too difficult or strenuous. You will cross a number of streams. After about 3.5 miles from the trailhead, you will cross Graysill Creek. The trail then begins to climb. About half way up this climb, look for a small trail that goes off to the right.

Beautiful waterfall on Cascade Creek.
Following this trail will take you to an overlook for a beautiful waterfall on Cascade Creek. Head back the trail and continue on a bit longer to where the trail splits again. To the left is the Graysill trail, which climbs the ridge to the west and joins the Colorado Trail. The Cascade Creek trail veers to the right and heads down to another crossing of Cascade Creek. This is where I turned around and headed back.

If you cross the creek,
the trail heads north into the headwaters of Cascade Creek passing a number of waterfalls before it ends at the Colorado Trail. My out and back hike took about 3 hours and the total distance was just under 9 miles.

Looking north towards the headwaters of Cascade Creek.

Map of hike.
Elevation profile.

Thursday, June 20, 2013

Camping in Upper Hermosa Creek

Our campsite.
Every year I force my family to go camping with me for Father's Day weekend.  This year we went camping in the Upper Hermosa Creek area, which is an easily accessible area to camp with a back-country feel.  However, it is a very popular camping area and not a place to go if you are seeking seclusion.  We had two other families nearby and we were pretty far up the valley.

Harris Ranch area.
Directions: From Durango, head north approximately 30 miles on Highway 550 to Durango Mountain Resort (fka Purgatory). Turn left into the Resort entrance and follow the main road looking for the signs pointing to Hermosa Park Road, which will be on your right.  Follow Hermosa Park Road, which quickly turns into a dirt road and begins to climb.  The road is well maintained and easily traveled by the average passenger car.  The road is also known as Forest Service Road 578 and it will fork once or twice prior to descending into the Harris Ranch area.

Playing in the creek.

Keep following the signs to Sig Creek Campground and Upper Hermosa Creek Campground and you will head in the right direction.  After about 4.5 miles heading mostly due west, you will pass the Upper Hermosa Creek Campground and the upper trailhead for the Hermosa Creek Trail, which enters one of the largest unprotected roadless areas in Colorado. The road will curve and begin heading north along the Upper Hermosa Creek.  Soon you will come across numerous pull-outs along the creek that make for great camping sites.  We drove another 2 3/4 miles up the road and found a more isolated spot right on the creek.  Fair warning, once you pass the intersection of Forest Road 578 and 550, the road becomes substantially rougher and is only suitable for 4-wheel drive vehicles.
Old cabin at the Graysill Mine.


Pick a spot along the road and have a great time camping.  Our site had ample shade due to numerous large pine trees and had the sounds of a babbling brook just a stone's throw from our tent.  There are no services up here and as a result, you will need to bring in your own water.  Please make sure to pack out your trash.  My kids had a great time exploring the creek and throwing rocks in the water.

Bugs were not a major problem but the mosquitoes can be sneaky. Definitely bring repellent but the mosquitoes were not swarming when we were there.  At night, the stars were spectacular and we saw several satellites travel across the night sky.

High alpine lake near Bolam Pass.
The next day, we drove up Forest Road 587 to Bolam Pass, where the Graysill Mine was located. Some of the uranium from this mine was used in the first atomic bombs built by the United States.  There are still remnants of the mine camp standing, including one intact cabin.

As you continue on the road, you will pass two beautiful high alpine lakes and climb to the top of Bolam Pass, which offers beautiful views of Lizard Head, Mount Wilson and the Tin Basin.

We stopped for lunch and enjoyed watching the ground squirrels and pika scrambling through the boulder field below the road.
Mt. Wilson and Lizard Head from Bolam Pass through a passing rain storm.

Ground squirrel.
Pika!

Wednesday, May 29, 2013

Mancos Canyon


Ruins in Lion Canyon
Last week, I was a chaperon on a three-day camping trip with 85 8th graders from Escalante Middle School.  And yes, I actually volunteered for this trip! Why, you may ask??? Because it was an opportunity to camp and hike in an area that is not open to the general public - the Ute Mountain Tribal Park. Plus, my son was one of the 8th graders. We got to camp and hike in Mancos Canyon, which is located south of Mesa Verde National Park and on the Ute Mountain Ute Indian Reservation.  

To camp and hike in Mancos Canyon, you must have permission and get a permit from the Ute Mountain Ute Tribe and have a tribal guide with you on any hikes.  If you are caught without permission, a permit or a guide, you will be arrested by Tribal Police and end up in Tribal Jail, where you will be subject to prosecution under Tribal Law by Tribal Courts - essentially the same thing as being arrested in a foreign country.  In other words, be smart and don't go on Ute Tribal Land (or any other reservation land) without permission.
More ruins in Lion Canyon

Directions: From Historic Downtown Durango (Main Ave. & College Ave.), travel west on College for two blocks to the intersection with Camino Del Rio, turn left heading south for one block and veer right onto US Highway 160 going across the bridge over the Animas River.  You stay on US 160 and travel through Hesperus, Mancos and Cortez, CO.  On the west side of Cortez, US 160 combines with US Highway 491 and heads south out of Cortez.  You are getting close when you pass the Ute Mountain Casino.  The entrance to Mancos Canyon is the dirt road (Mancos Canyon Road) on the left (east side) of the intersection where 160 and 491 separate. US 160 goes on to the Four Corners National Monument and 491 (former Route 666 fka "Devil's Highway") heads into Shiprock, NM.

Vulture riding the thermals above Lion Canyon
On the first day of the trip, we hiked into Lion Canyon, including climbing down a number of steep ladders, and were able to get up close with a number of Ancestral Puebloan ruins along with petrogylphs and other rock engravings, including one by Richard Wetherill who discovered these ruins and the ones in Mesa Verde. The end of the hike included a climb up a 30-foot ladder into a ruin called Eagle's Nest, because an eagle had built a nest on a rock outcrop just above the ruins.

The next day was spent traveling up and down Mancos Canyon Road doing short hikes to observe petroglyphs and unexcavated and undisturbed kivas.  
Eagle's Nest
Some of the petroglyphs depicted the Ancestral Puebloan creation and emergence stories. In most of these areas, we could walk around and pick up pottery shards that date back to between 1 - 6 A.D. I even found an ancient cutting tool and another person found ancient beads. While you can pick up and enjoy these items, you are not allowed to take them with you.  The Ute guides we had on both days were wonderful, friendly and very knowledgeable about the ruins as well as local flora used for various medicinal purposes. 

We also saw numerous types
Petroglyphs in Mancos Canyon
of lizards, wild horses and rattle snakes.  This trip helped me to truly appreciate the ancient history of southwest Colorado coming to understand that this area has been inhabited for more than 2000 years.
Lizard in Lion Canyon

View of Mancos Canyon

One of our Ute guides performing a blessing.